Using a Micrometer – Physical data gathering
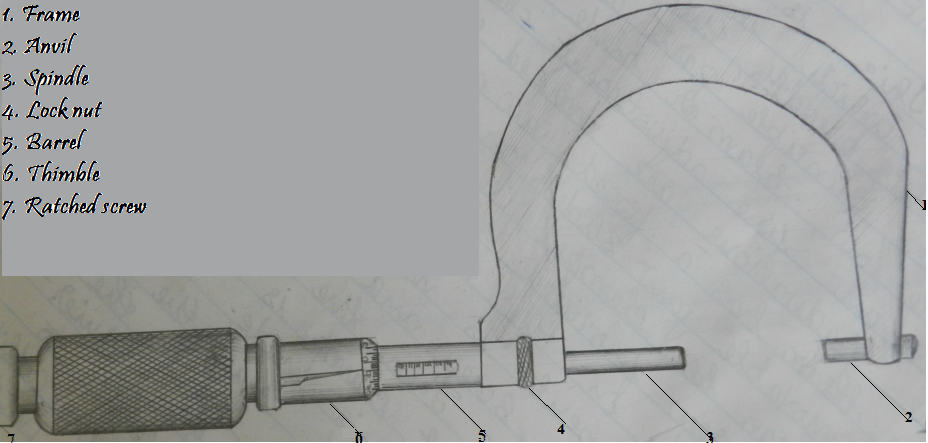
Micrometer is a precision instrument which is able to take delicate measurements of all classes of materials. In the classification of sizes, what is known as a one inch micrometer will measure from 0 to 1” and a two inch make from 1” to 2” and three inch make from 2” to 3” and so on. But whatever be the sizes of micrometer, the range of measurement is only one inch. The principle parts of a micrometer are frame, anvil, spindle, lock-nut, barrel or sleeve, thimble, ratched stop and ratched screw. The spindle can be drawn in and out of the barrel. There is a nut threaded 40 turns to the inch of the spindle inside the barrel and attached to the thimble. If you turned the thimble 40 complete turns, you will either draw out or the distance exactly one inch. Along the barrel, there are ten divisions in which each division is sub divided into 4 divisions. This is the main division and space occupied by these 40 divisions is one inch. The thimble is divided into 50 or 100 equal parts at the beveled edge. The micrometer readings are taken by knowing the positive error or negative error of the micrometer.
Above is the snapshot of Micrometer, your high precision data measurement instrument.
